If the labels you print are at first not aligned properly on your label sheet, these suggestions for fine-tuning your printouts will help. Please note that once you adjust the printouts for your printer, the new settings will be saved and you won't need to adjust again unless you change the printer you are using.
 First, AllergistLabels.com requires one specific type of label sheet. You will need to use 30 label sheets (10 rows of 3 labels per row, where each label is 1" x 2 5/8"). Avery's 5160 labels are a commonly used example of the required format. Make sure you are using compatible label sheets.
When labels are properly aligned for 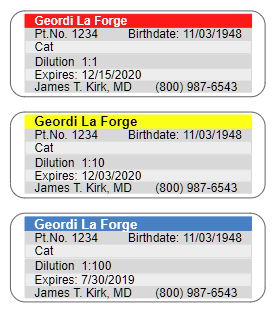 your printer, the label contents will fall cleanly within the boundaries of each of the peel-off labels.But printers are slightly different in their precision in positioning printed labels on label sheets. And because AllergistLabels uses nearly all the available space on each label, even slight printer differences can cause labels to land somewhat high or low on each row of labels.
AllergistLabels provides an "AdjustPrintout" button (which opens a pop-up dialog) that will let you fine-tune the position of the printed labels to work well with your printer.
There are two types of misalignment that can occur. First, the printed labels can be too high (or too low) on the label sheet.
Note that in the example below, each label's content is being printed a bit too high on each of the labels on the label-sheet.
If you could slide them all down on the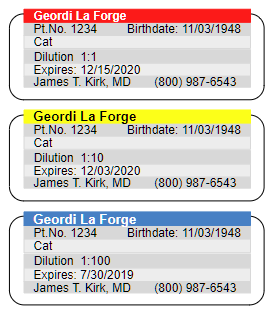 page by the same small amount, they would all land in the proper spots. The adjust printout dialog provides an overall vertical adjustment to move all the printed labels lower (or higher) to correct for this. Here, of course, we would want to move them all lower.
To make this adjustment, Click the "Adjust Printout" button and in the pop-up dialog, set the "Move the first row of labels" values to 6.0 points (as an initial trial adjustment) and click the "lower on the sheet" radio button.
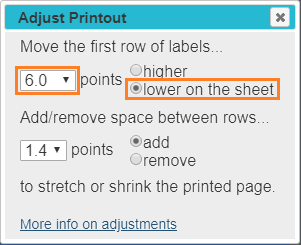 The way to determine if this initial guesstimate of "6.0 points lower" is an appropriate adjustment is to print out the labels and check to see if they were lowered enough, not enough, or possibly too much. You will likely need to fine-tune the amount (more or less than 6.0) until the positioning is correct, but in this example, you wouldn't want to change this setting to "higher on the sheet".
If "6.0 points" (or whatever the fine-tuning produced) was a good guesstimate, the alignment problem will have been corrected for the first row of labels. Because the position of the first row of labels affects all the subsequent rows, continue to adjust the first row positioning until it falls properly on the first row of the label sheet. Don't worry about where subsequent rows fall. If they are too high or too low, a second adjustment of the amount of space allocated between the rows will correct this.
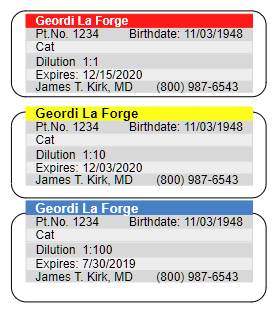 After the first row adjustment, the printout of the labels may look like this image, with the first label properly placed, but with the content of each subsequent row of labels sliding up a bit higher than the prior row, and falling too high on the sheet. If your printout looks like this you will need to add more space between rows. If the opposite is true, and each subsequent row is sliding down the page too much, you will need to remove space between the rows.
This second type of misalignment can be adjusted with the second group of settings on the "Adjust printout" pop-up dialog. In this example with too little space between each row of labels you will need to add more space.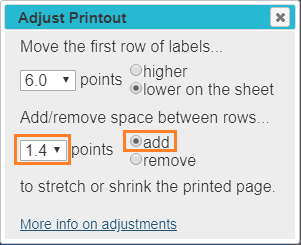
Choose an initial intermediate value (like 1.4 points), and try printing another sheet to evaluate this guesstimate. As before, it is likely you will need to fine-tune this adjustment by evaluating the printout and by adding fewer or more than 1.4 points between rows.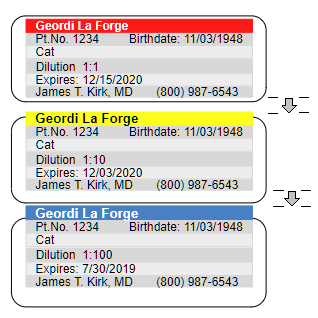
That's it! In summary, the process of adjusting printouts for your printer is to (1) get the top row of labels to align properly with the first row of peel-off labels on the label sheet, and (2) if needed, add or remove space between rows of labels to vertically spread or shrink the full printed page of labels so all the remaining rows print where they should be. Once you do this ajustment, the application will save your settings.
If you are curious about what "points" are, they are a measure of distance in typography, and PDFs use this measure. There are approximately 72 points per inch. So a line of text printed with a 72 point font will be Very close to an inch high on your screen and when you print it (from the top of the "V" to the bottom of the "y" in the word "Very"). If, for example, you make an adjustment of 6.0 points higher using the "Adjust Printer" dialog, you will be moving the labels on the label sheet 6/72 of an inch higher on the sheet (or about 1/12 of an inch).